ODESZA DRUMLINE MASKS
Just ten years ago it would have been nearly impossible for a shop like ours to iterate and prototype a project like this, especially in the given time frame. Luckily, we live in an age where modeling and 3D printing are highly accessible and intuitive, where rapid prototyping can be put in the hands of makers at every level.
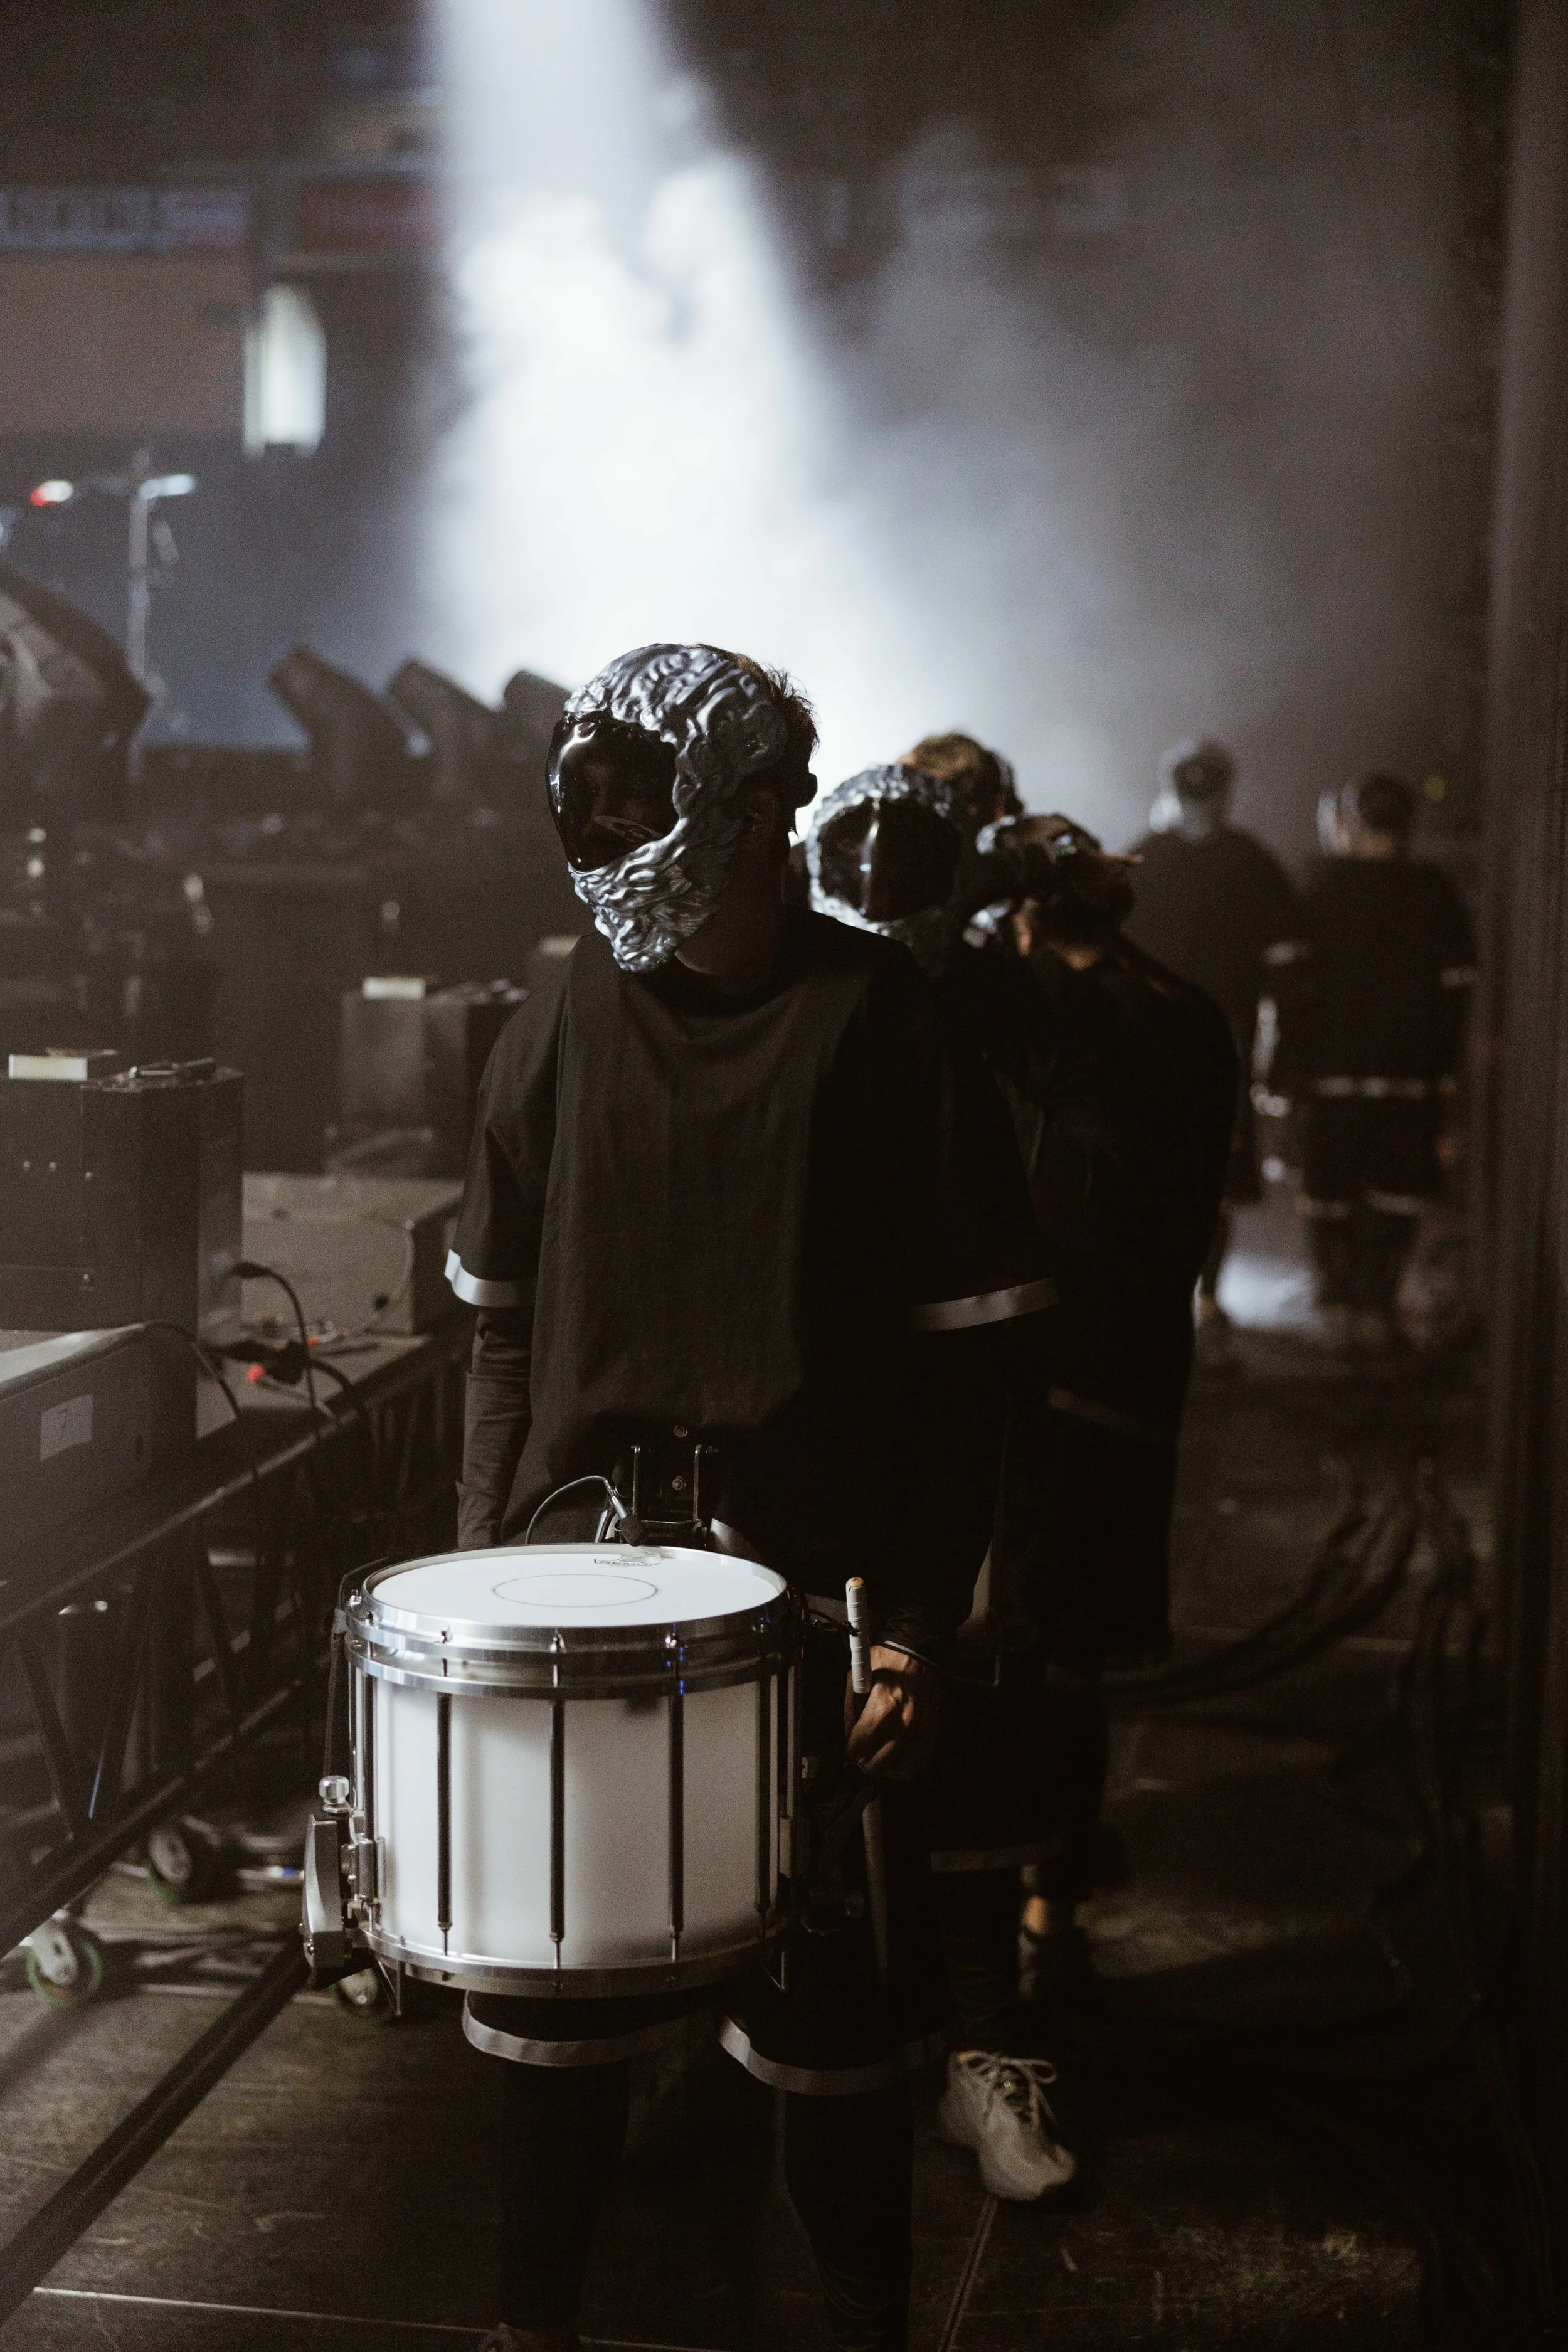
When we were first approached about this project the objective was simple: print this model. What really enabled us to take this project from start to finish was the open and honest channels of communication between our team and Odesza’s and our collective knowledge of what was possible at this scale. Creating props that would be worn on performers’ heads, have an acceptable level of visibility and stand up to tour life was a task that required a lot of prototypes and fittings. This is how we were able to navigate creating the iconic masks for Odesza’s drum line on The Last Goodbye.
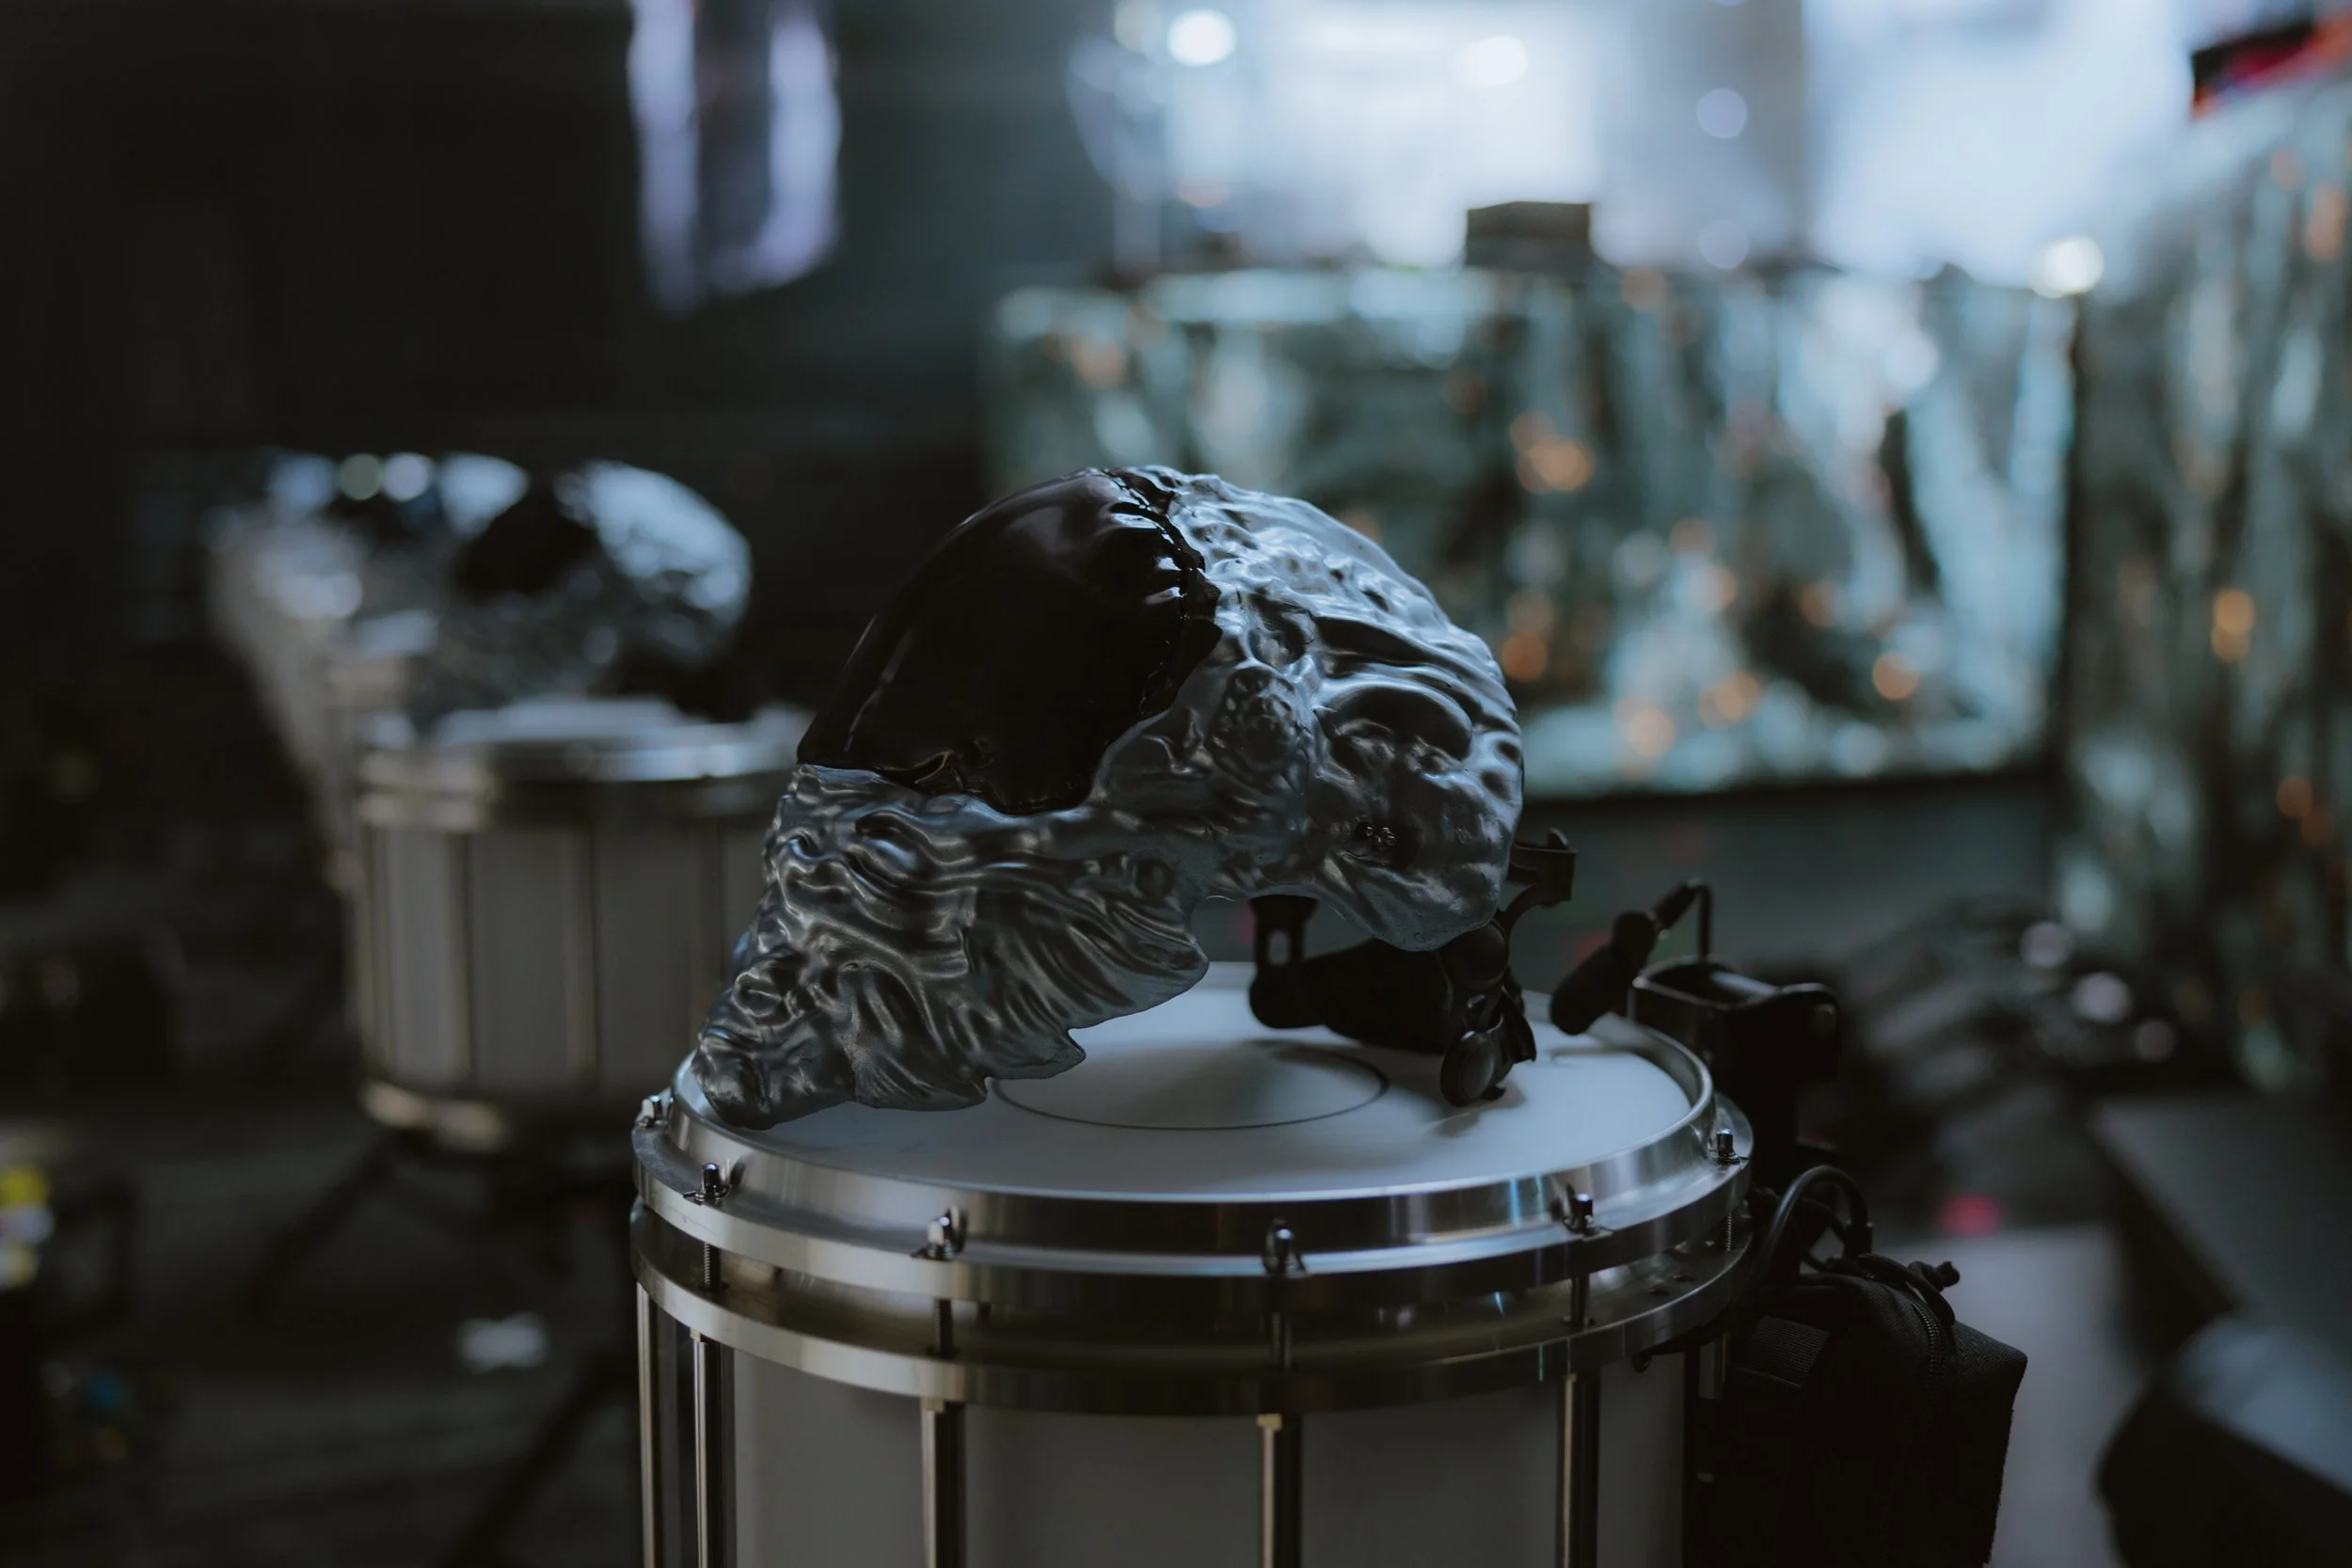
Photo by Julian Bajsel

Prototyping…
The 3D model was originally sculpted in Zbrush by aeforia and then printed on one of our FDM printers as a proof of concept. This began a journey of learning how to properly scale and shape it; we had to modify the model to more accurately fit on a human face with integrated headgear that would allow the mask to fit on any size head. In total we created nine versions, each with slight changes in shape and size. With each prototype we came incrementally closer to a mask that would fit properly and achieve the desired aesthetic goals.
Fortunately the two Drumline Leads, Ben Belleau and Kali Ridal, are based close to Dark Moon Designs’ shop so we could arrange frequent visits to test each version and exchange notes. Anytime a prop is designed to be worn it is necessary to do fittings with the performers who will actually wear the product. This was especially true as these would be worn on the head and would reduce visitibily while running through choreography and playing an instrument in perfect time.
We could print a prototype in as little as a day, test the shape, edit the model, then get a refined print started overnight to be completed for the following morning. Early in this phase we decided that the final product would not be printed but instead utilize a resin process. With the time it takes to print a full density mask and the almost equal amount of time it takes to fully sand, apply epoxy and finish, it would be far more efficient to create a mother mold and pour more finished pieces right out of the gate. The speed of the pouring process allowed us to spend more time dialing in a final print with a clean finish. The finish of the final print is important as the shape and surface texture would be duplicated exactly in the mother mold which would transfer to the final products. The final print took about three days to complete using much slower speeds, a smaller nozzle and increased details. Once the print was finished, we smoothed the surface and coated it in a thin layer of resin to eliminate imperfections.


Build…
While the printing and editing process was taking place we explored different solutions for headgear which would mount these masks to the performers’ head. We were aware that the drumline had specific choreography that could potentially get quick and forceful so this solution would have to be reliable, strong, and well fitted. Natalia was deep in the welding process for another project when it dawned on her that welding headgear is a near perfect off the shelf solution. Welding headgear can be easily modified and is already designed to change shape and size to fit the majority of head shapes. It also has to stand up to the rugged nature of metal work.
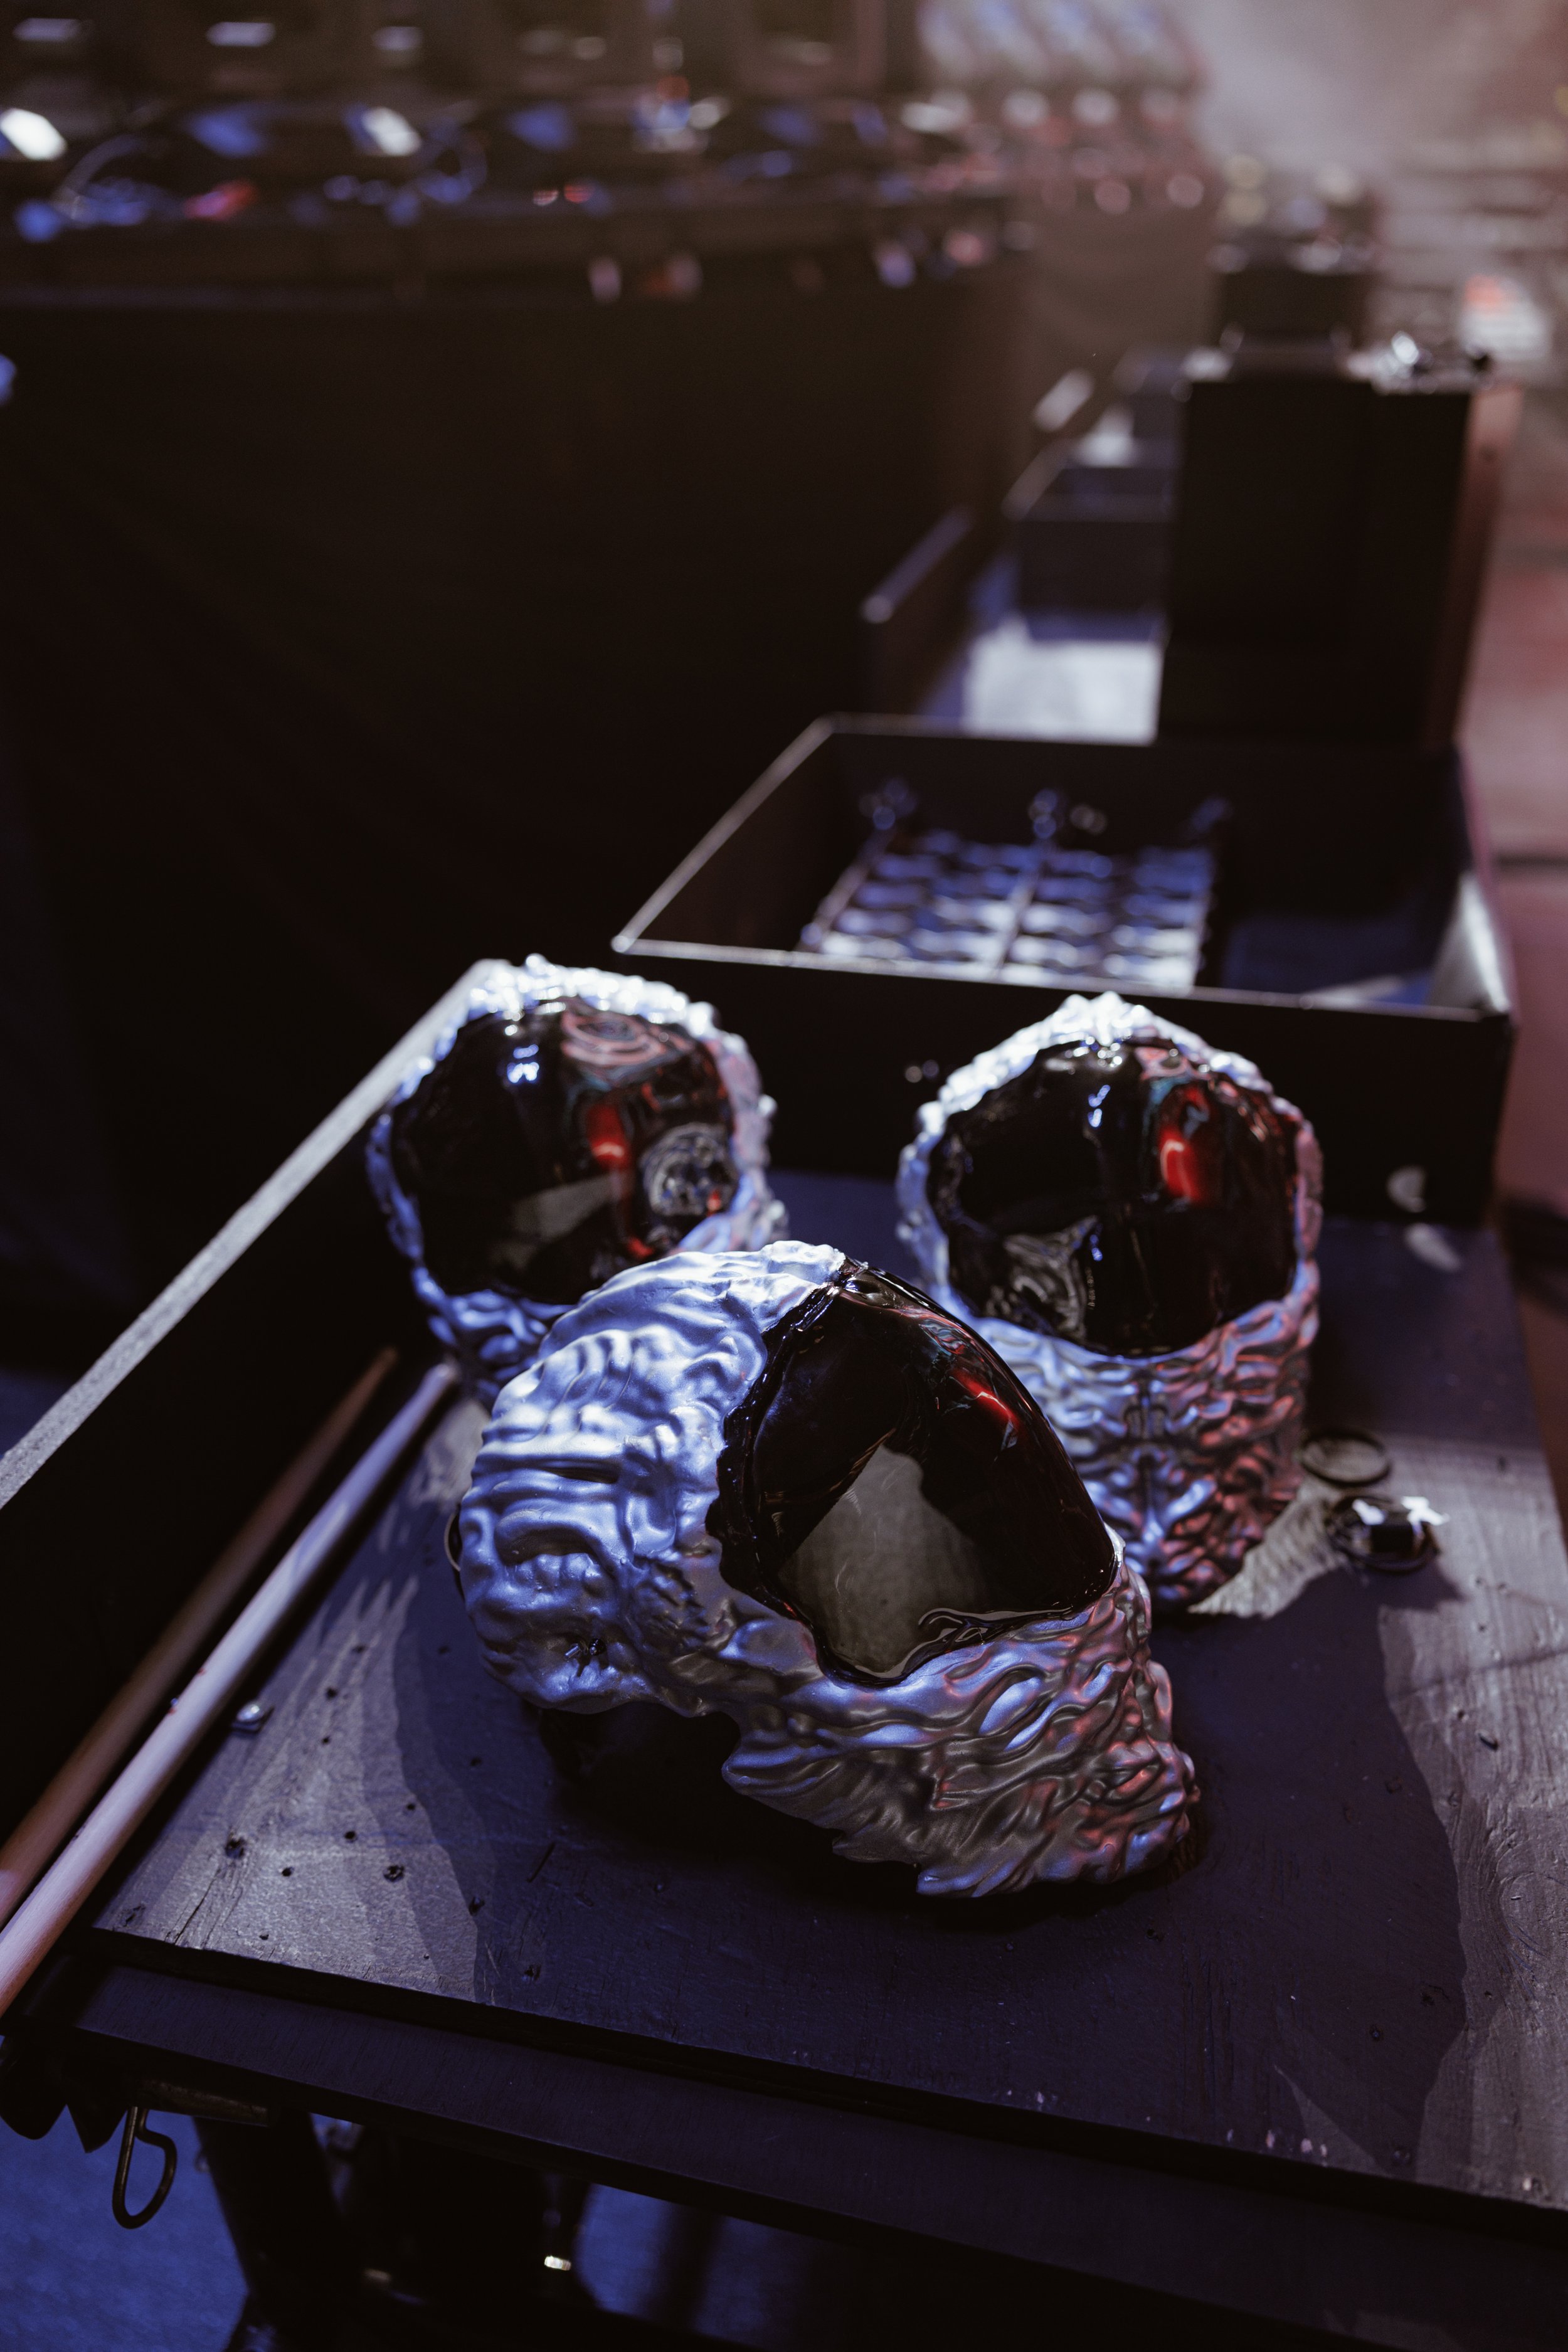
Once all of the masks were poured they had to be sanded and painted, the translucent visors had to be dyed to the correct finish and attached to the rest of the mask, and the headgear had to be installed. These steps are easy to gloss over in hindsight but in reality we had to use many specialized processes to achieve the results we did.
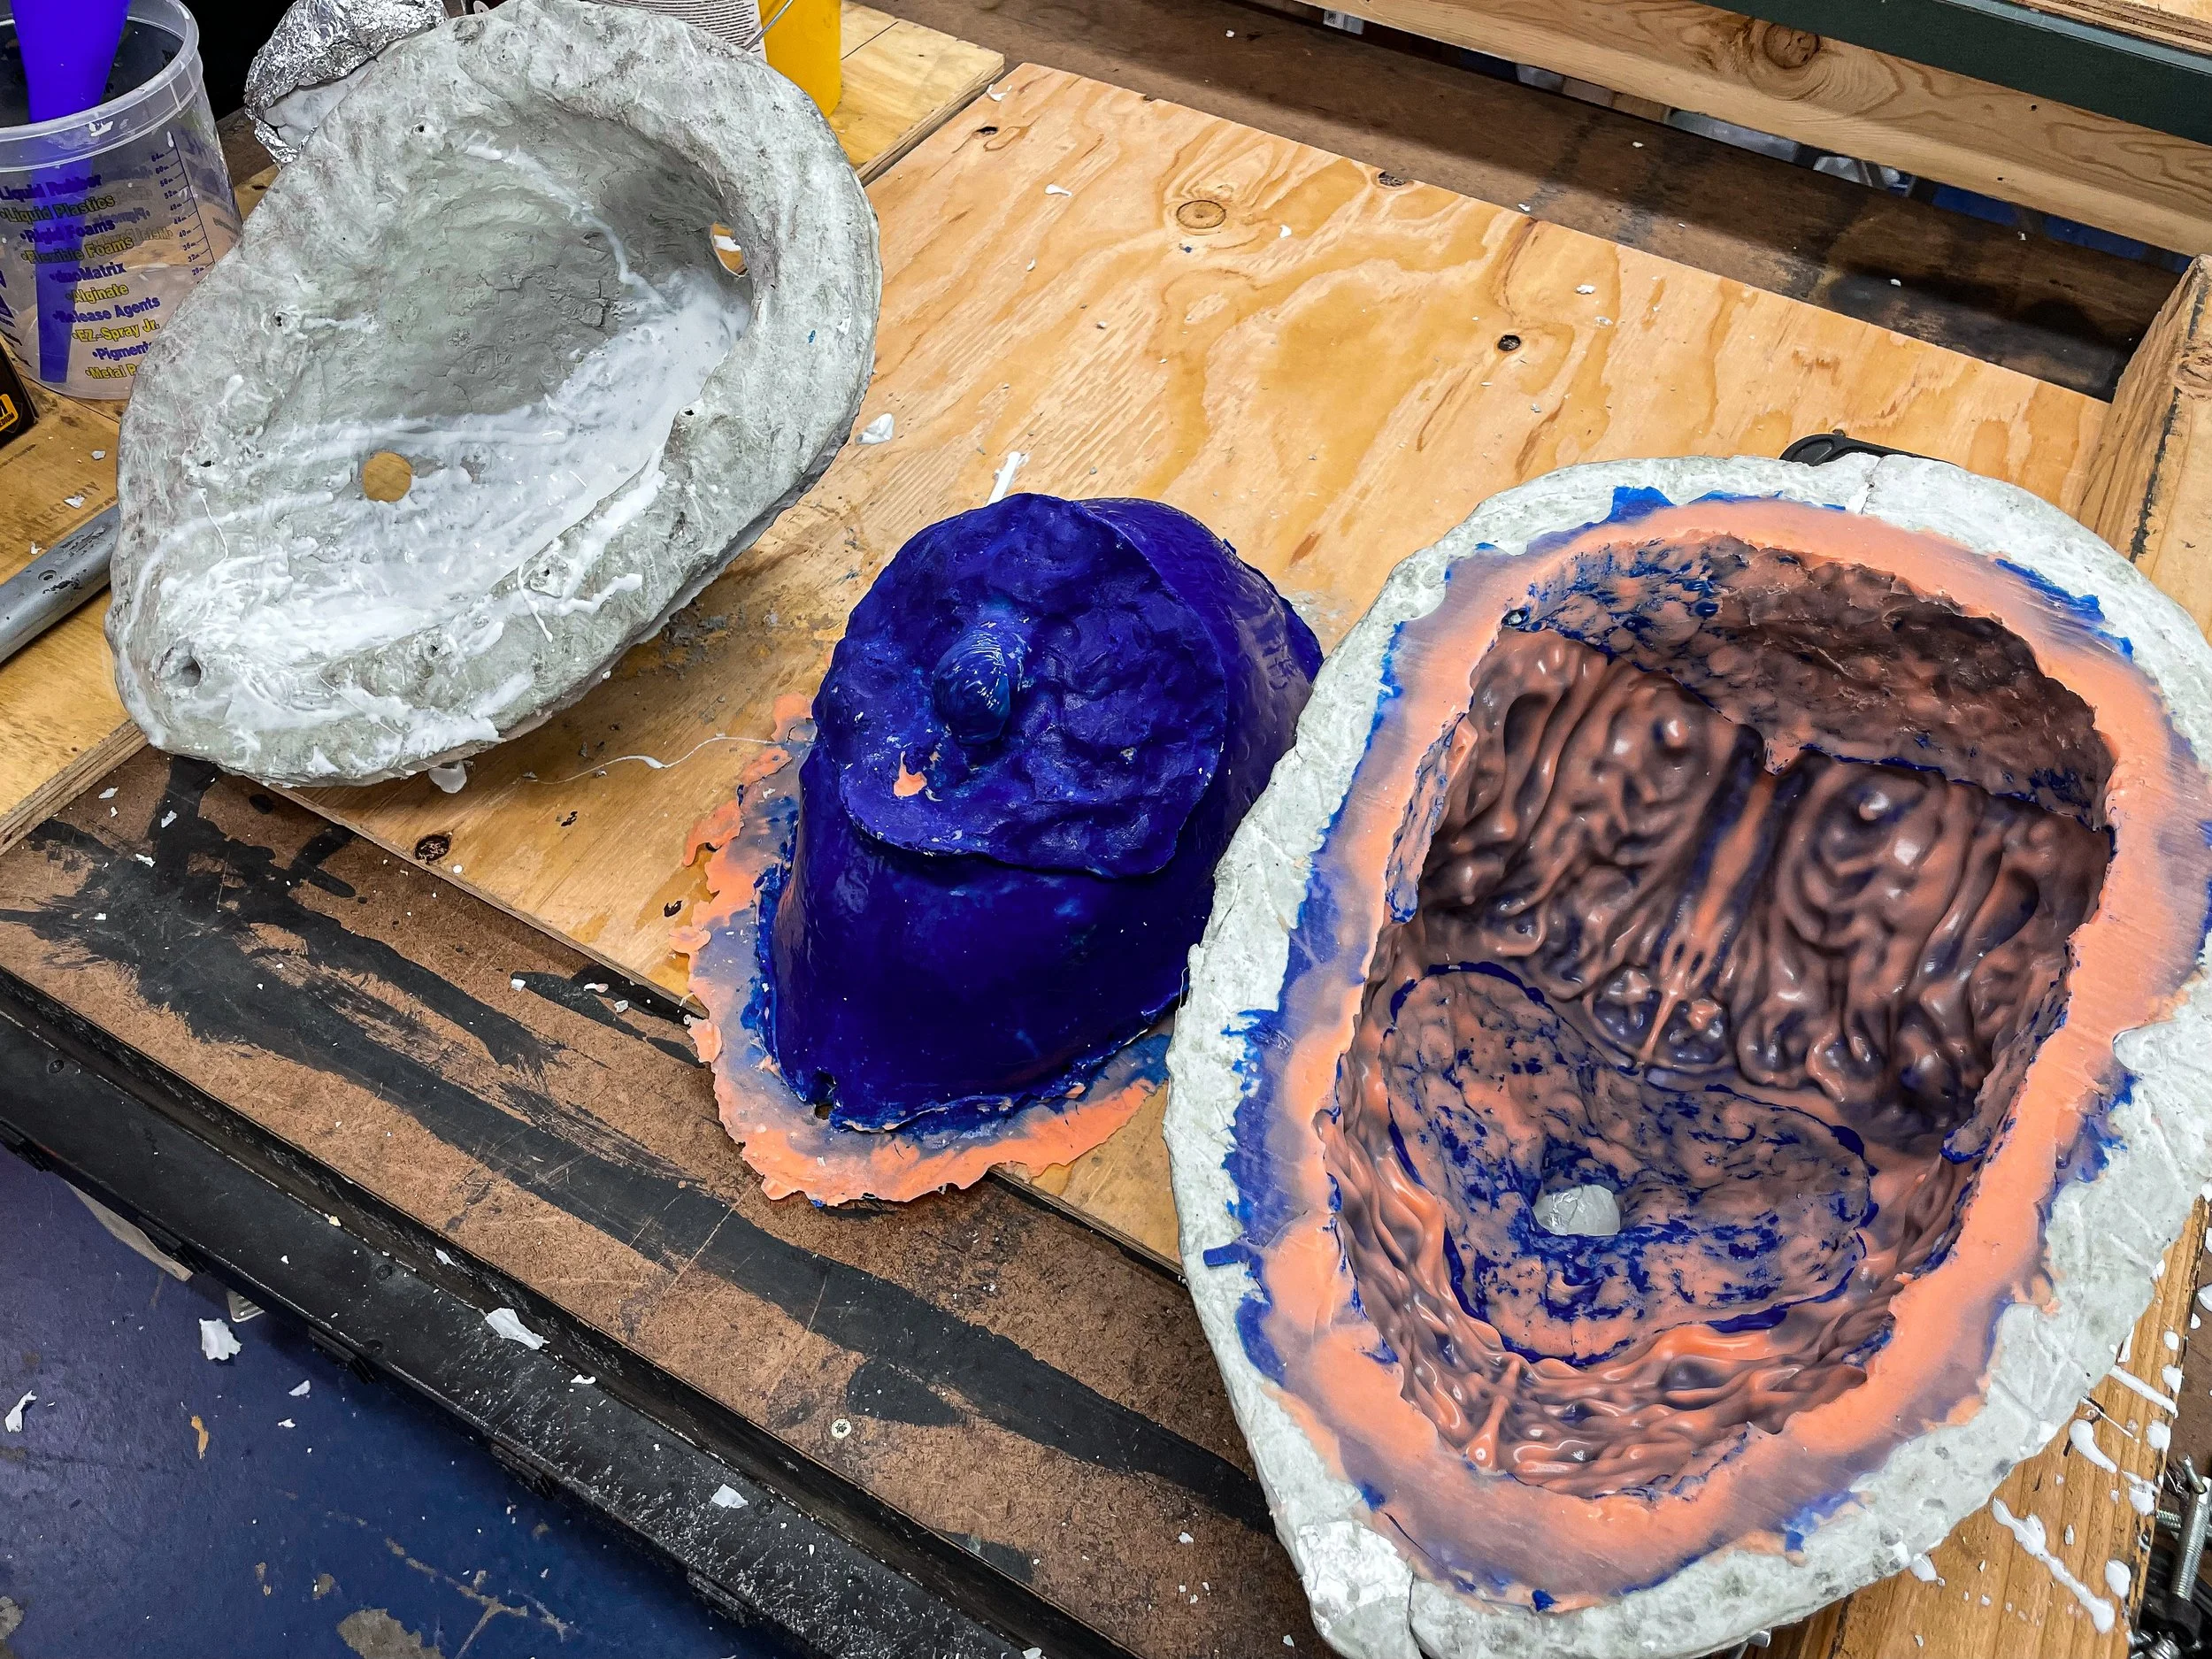
We cast all the masks in a two piece silicone mold with a rigid three piece mother mold holding it in place. Thanks to the team at Reynolds Advanced Materials in Denver, we were able to source all our epoxy resin locally and discuss the model’s complexity when it came to replication. Our casts and mold were made via a variety of materials: Rebound 25, Ease Release Spray, clay, Sonite Wax, Freeform AIR, and Smoothcast 65D. The mother mold took five days to create but once it was finished we were able to comfortably pour five masks in an eight hour workday.
The visors were all vacuformed on a buck derived from the original model, then dyed and heat treated to fit within each cast. For the surface finish of the masks we used an Axalta car paint system with a 2K gloss clear coat and acid etch primer. This created a strong coating on all the masks which could stand up to scuffs and scratches common on tour.


Seeing a fleet of completed masks at the end of the build was incredible. It was a pleasure to use so many processes of manufacturing and to stretch our legs on some new skills. Interfacing with Odesza’s creative team was seamless and rewarding and working closely with the drumline was fun and highly educational. Every time we see them come out on stage we become cheerleaders. We know that our additions to their costumes haven’t made their jobs easier, but they definitely achieve an outstanding aesthetic.
Thanks to the Odesza Drumline:
Kali Ridal
Ben Belleau
Dan Allen
Drew Reitenger
Jack Fry
Jay Cunningham
Nathan Rearick
TJ Ghinder
Ryan Lynette
Amanda Watson
And Thank You to:
Sean Kusanagi and Luke Tanaka - Foreign Family Collective
Jennifer Crenshaw


Photos by Julian Bajsel